Canning
Pressure Canned Beef Stew
20
May
May

.

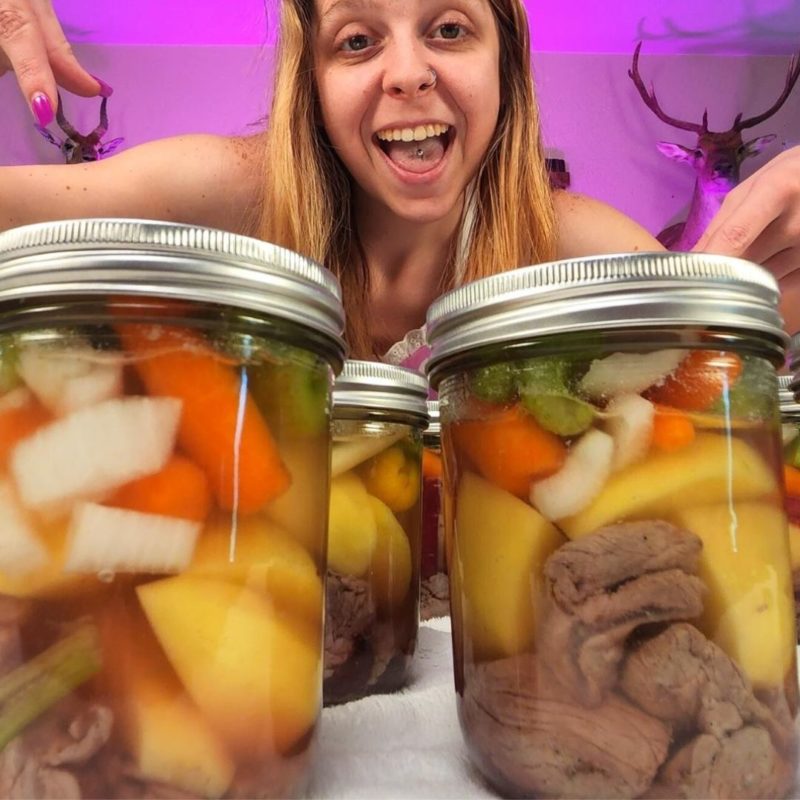
Canned Beef Stew
Can your own homemade beef stew in a pressure canner to have easy convenience meals at your fingertips. The following recipe makes approximately 6 quarts (or 12 pints) of beef stew.Prep Time: 30 minutesCook Time: 1 hour 30 minutesResting Time: 17 hoursTotal Time: 19 hoursServings: 6 quartsCalories: 892kcal
Equipment
- 1 Pressure Canner
- 6 wide-mouth quart jars (or 12 wide-mouth pint jars)
- 6 Lids and bands
- 1 Jar lifter
- 1 De-Bubbler
Ingredients
- 4 to 5 lbs stewing beef cut into 1 to 1 1/2 inch cubes
- Olive oil to brown meat
- 12 cups potatoes peeled and cut into 1” chunks, or about 5 pounds potatoes as purchased, about 4 pounds when peeled, trimmed & prepared
- 8 cups carrots sliced into 1/2 inch rounds, or 2 1/2 lbs prepared (peeled/chopped), from 3 lbs as purchased
- 3 cups onions peeled and chopped into 1/2 inch pieces, or 1 lb prepared from 1 1/4 lbs as purchased or 2 medium onions
- 3 cups celery chopped, from about 1 pound prepared or 1 small celery head
- 12 cups beef stock homemade or store-bought, plus more to fill if necessary
- 4 1/2 tsp salt optional, adjust to taste (not required for preservation, only flavor)
- 1 tsp dried thyme optional, adjust to taste
- 1/2 tsp black pepper optional, adjust to taste
Instructions
- Brown the beef in a small amount of olive oil. Work in batches So that you don’t crowd the pan. It should be nicely browned on the outside, but not cooked through. (See note below!)
- Bring beef broth to a simmer in another pan. Add the browned meat, potatoes, carrots, onions, celery, salt, and seasonings, then return to a simmer. As soon as it begins simmering, prepare to pack the jars.
- Use a slotted spoon to scoop out the beef and vegetables into canning jars. Evenly distribute the solids across all the jars, leaving 1” headspace. (See note below!)
- Ladle the simmering beef stock over the top of the solids, still maintaining 1” headspace.
- Once everything is in the jars, begin to de-bubble!
- Wipe rims with white vinegar. Center lid on center of jar and secure the bands using only finger tight strength to allow the extra air to escape during the canning process. Use a jar lifter to place the jars in your pressure canner, and then close the lid.
- Allow the steam to vent for 10 minutes, then seal the pressure canner and bring it up to temperature.
- Process the jars at the appropriate pressure for your altitude (see notes) for 75 minutes for pints and 90 minutes for quarts.
- When the canning time is complete, turn off the heat and allow the canner to cool naturally back to room temperature before opening the canner. (Do not open early, or attempt to speed cool the canner!)
- Remove Jars with jar lifter.
- Once jars are removed, allow them to sit out for 12-24 hours to fully cool. Be careful because these will be VERY hot still!
- After the jars are fully cooled, remove the bands and check the seal of the lids. If your jar did not seal properly, just place it in the fridge and consume within one weeks time! all other jars can be stored for years to come!
- Enjoy!
Notes
**Make sure you do not use flour during the browning process. Even though flour is a great shortcut for browning your meat, it is not safe to use when canning.
***You do not have to combine all of your ingredients, you can skip this step and layer your ingredients inside your jar. Make sure to still simmer your beef broth and ladle over the ingredients keeping the 1″ of headspace. Follow the rest of the recipe.
Tried this recipe?Let us know how it was!